ADDING YOUR IMAGE
Adding your image/logo to your border is easy using Pixlr! These next few steps will help guide you to add whatever image you want onto your border. Please go through the directions on the Custom Borders Page before you continue on with the directions for adding your image/logo.
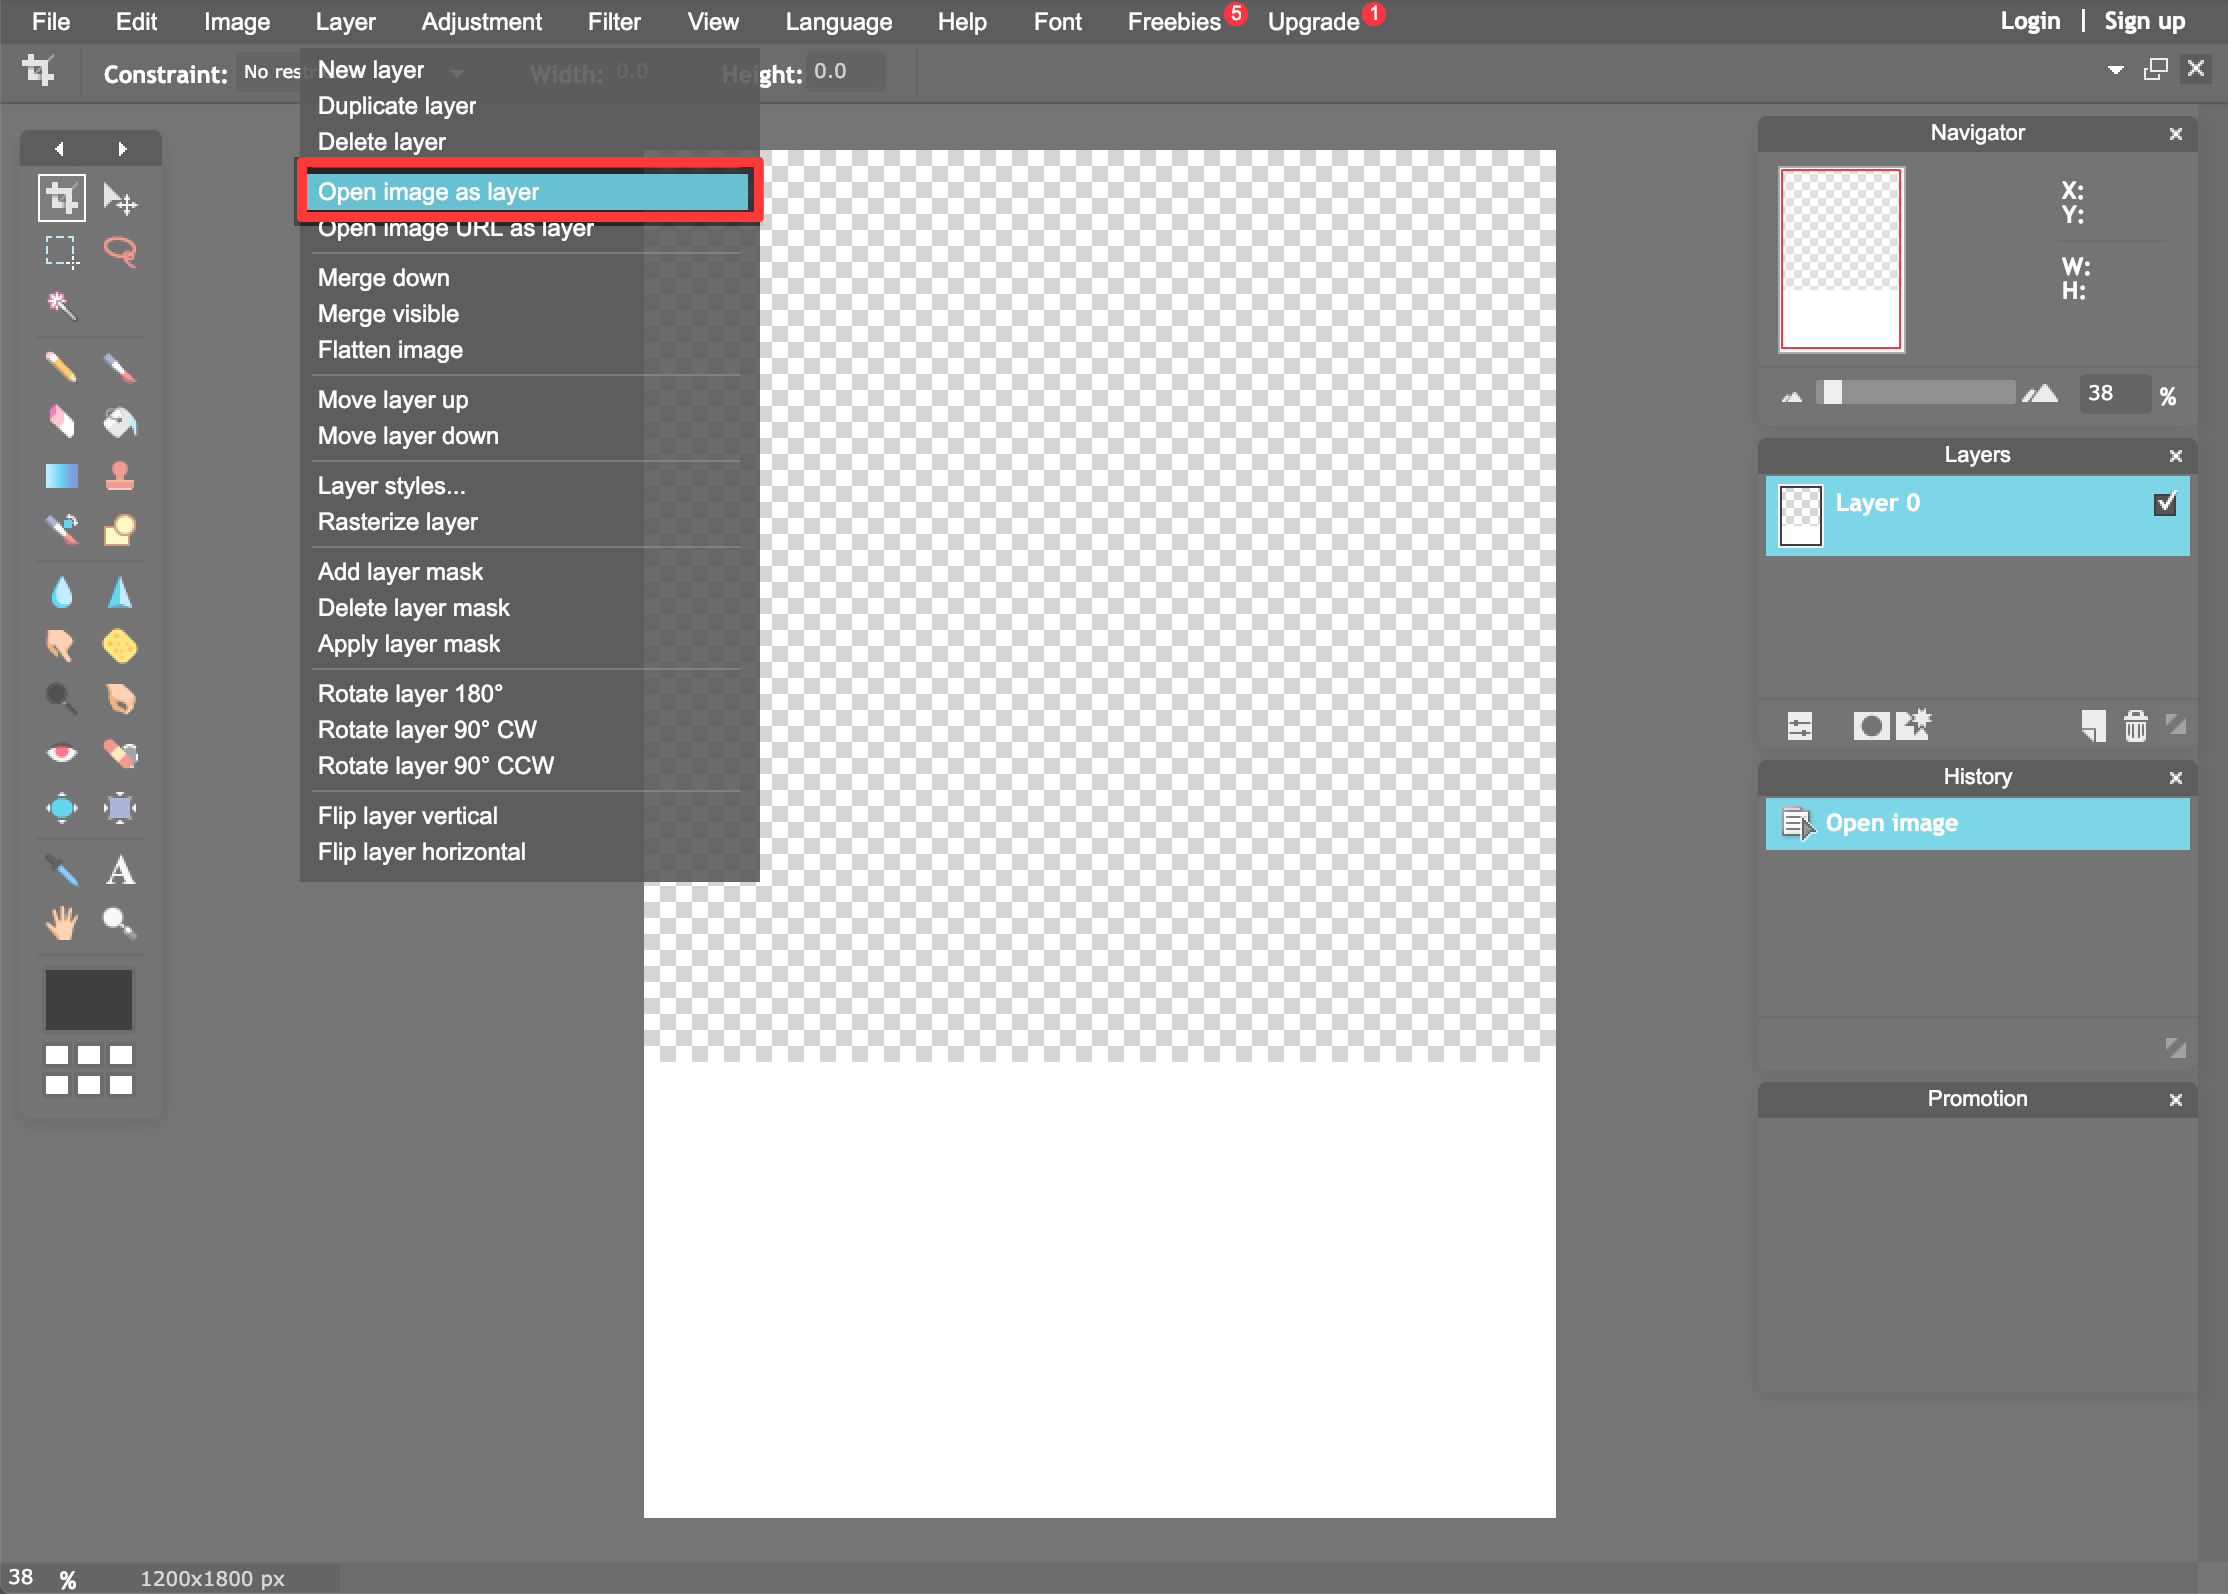
Step 1. Open your Image as a Layer
Once you’ve started with one of our template borders, you will go to the top row of options and click on “Layer” then click on “Open image as layer”. This will open the files on your computer. From there, you will choose the image you want to add to your border.

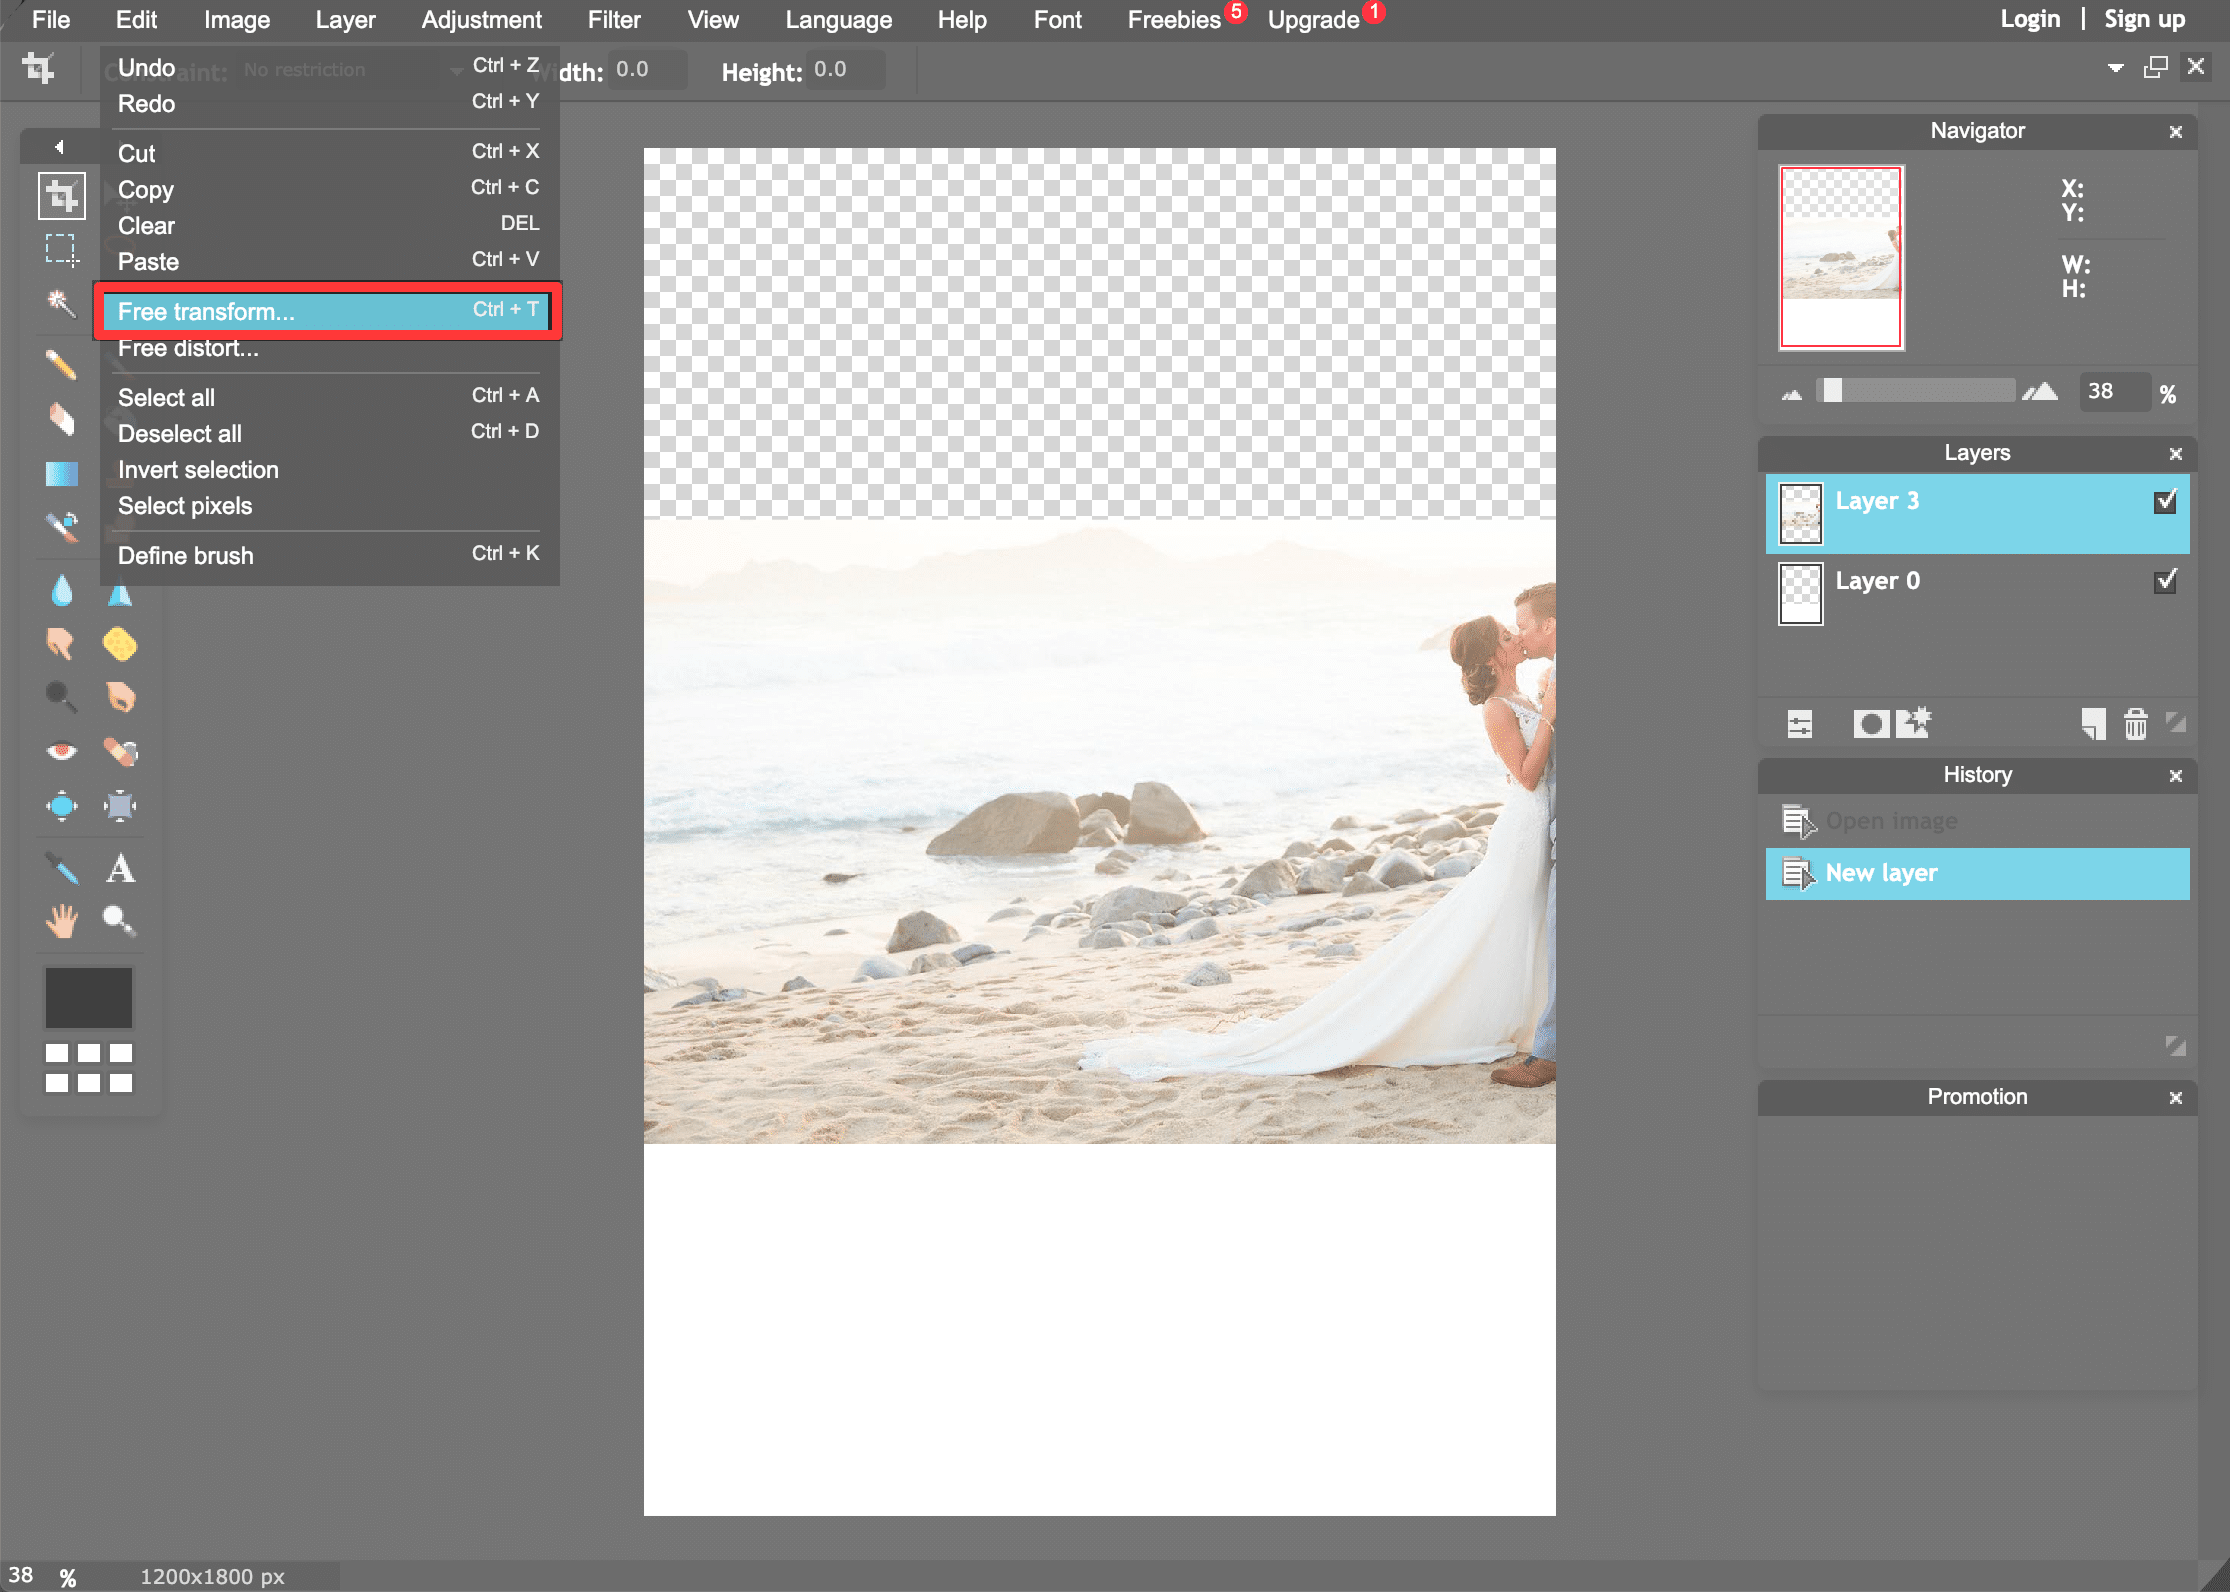
Step 2. Add Free Transform to your Image
You will then need to go to the top row and click on “Edit” then click on “Free Transform”. This will allow you to move your image around on your border and change the size of it as well.

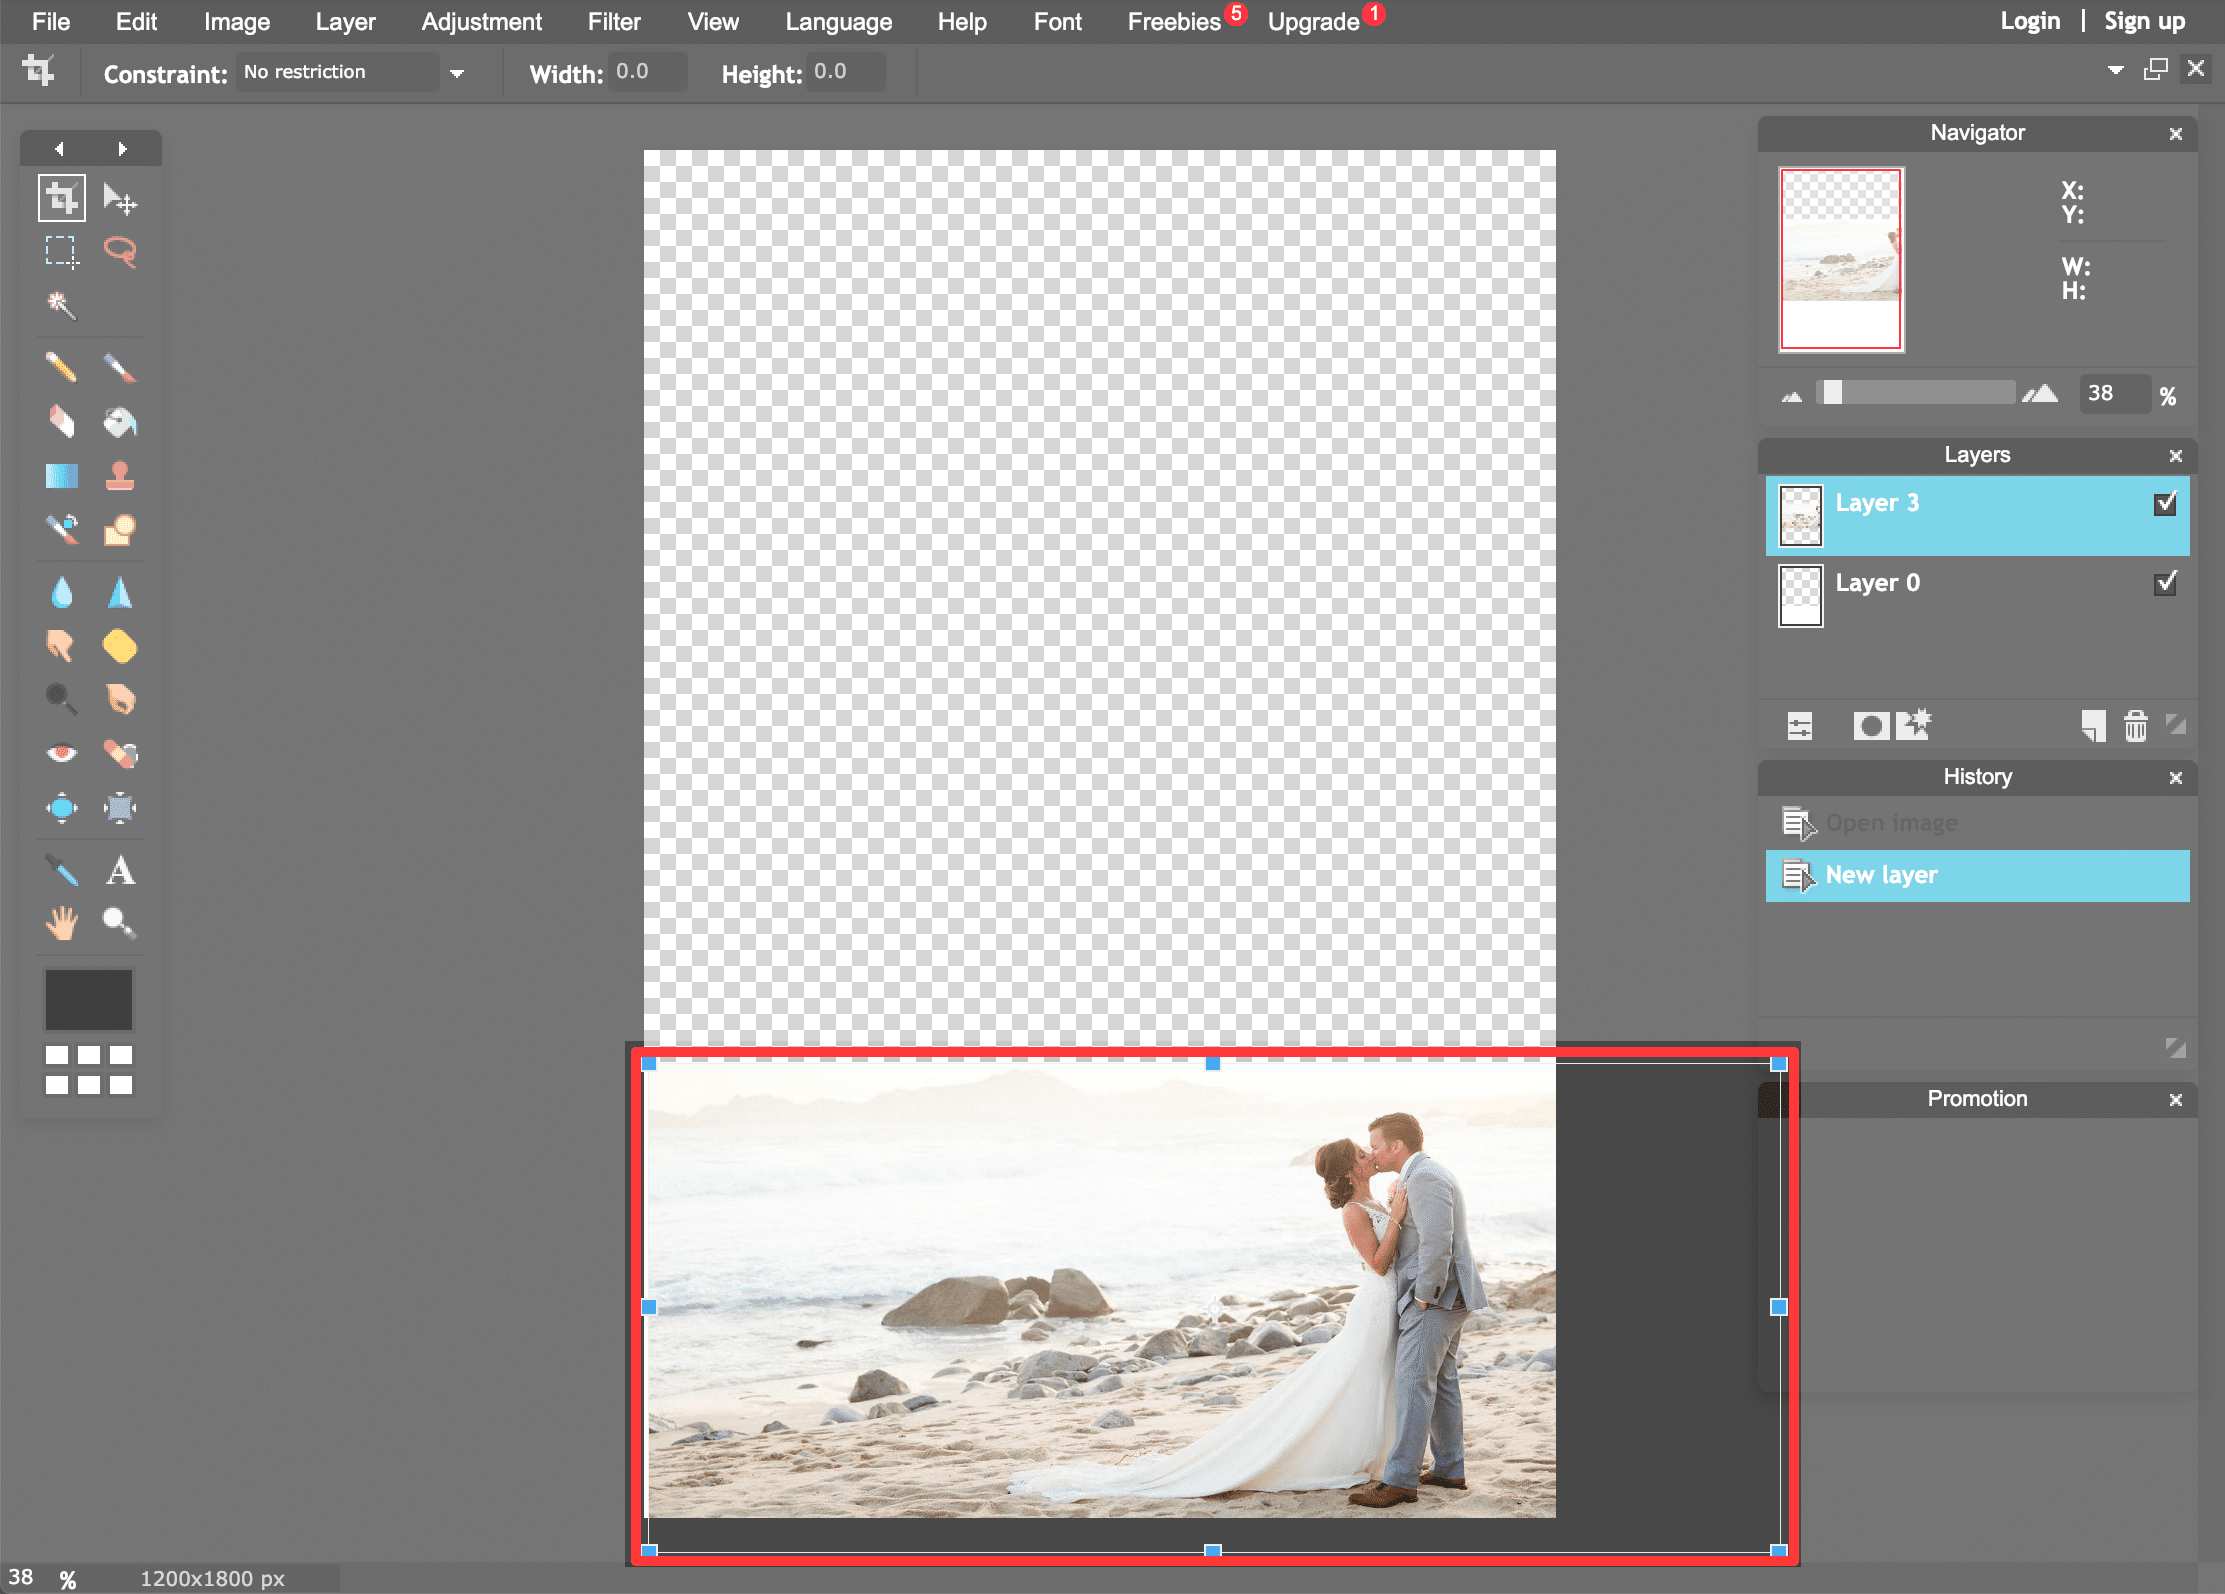
Step 3. Do Not Cross the White Border
When placing your image on your border, ensure that you do not cross the white area from the original border. If your image overlaps on the transparent areas (white & grey boxes), it will partially cover your images taken on the app.

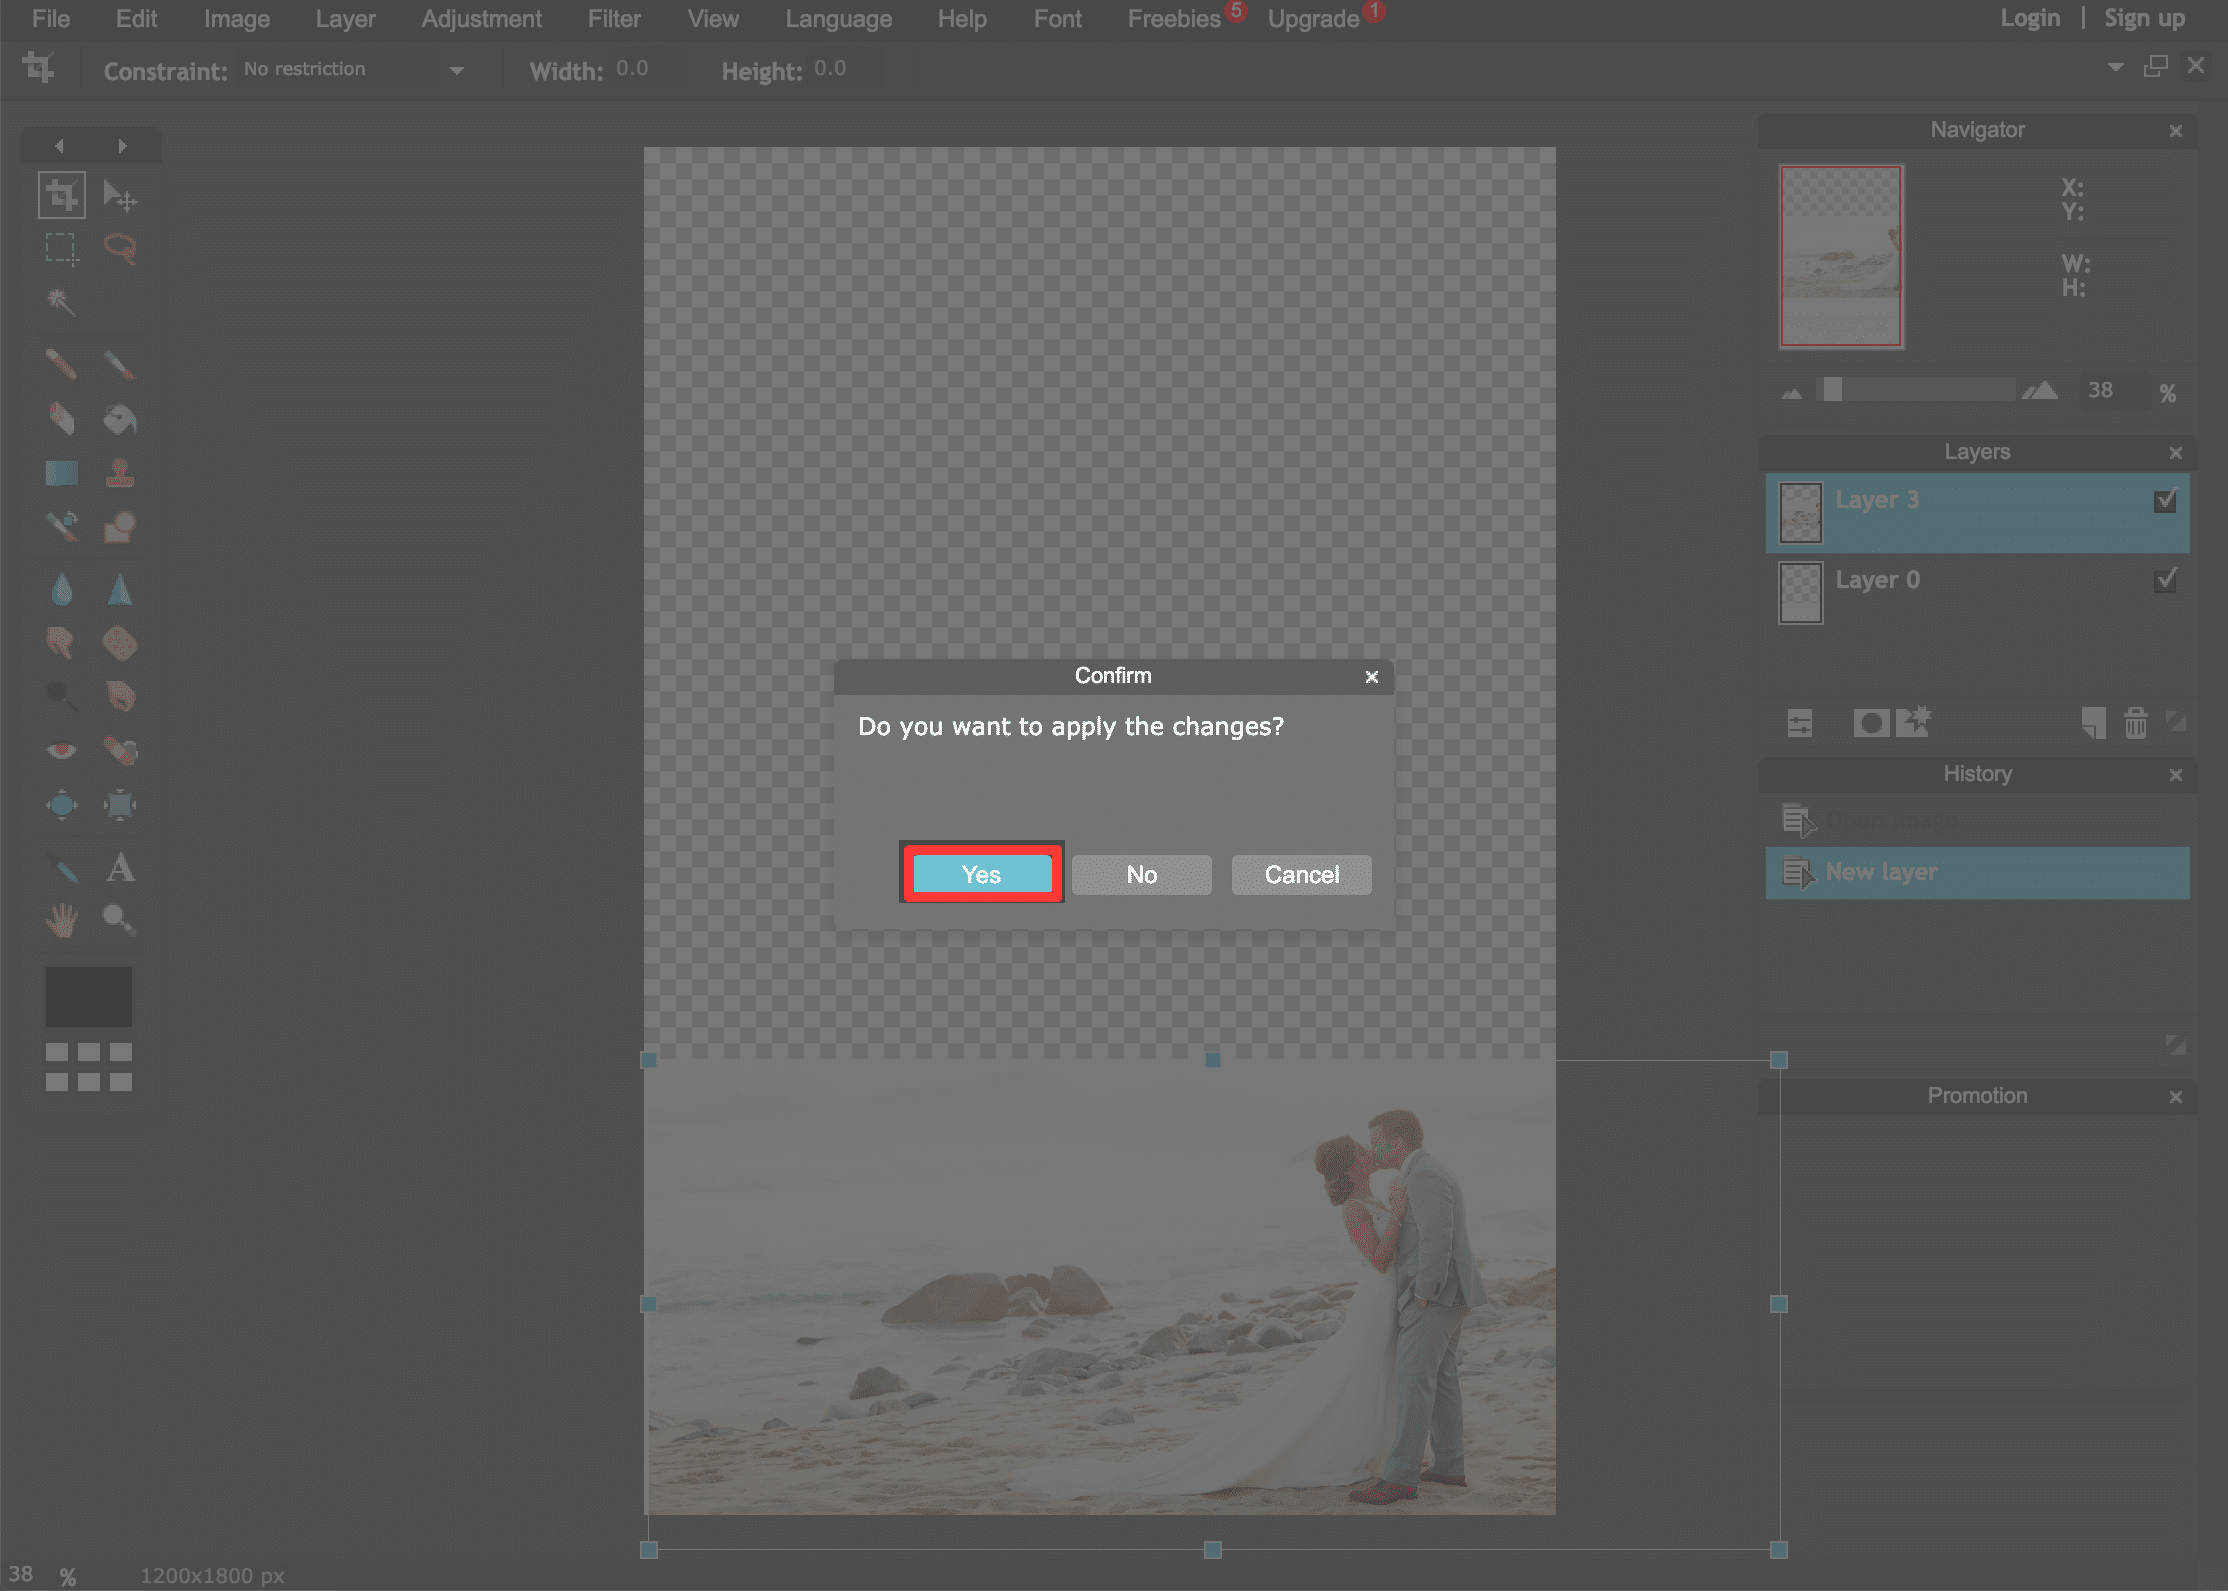
Step 4. Apply Changes
When you have finished editing your image and it is located where you want it, you will be asked if you you want to apply the image changes. Click on “Yes”. Now, you can save and then you will follow the directions on the Custom Border Page to upload your customized border to the DIY app!

